
OHMYGOSH. The secret of crème brûlée has been haunting me for YEARS. Like, seriously haunting me. You know those desserts that seem waaaaay too fancy to make at home but then you try and it’s actually… not that bad? Crème brûlée is NOT one of those desserts. Well, it is. But also isn’t??? Confused yet? Welcome to my brain, folks!
I’ve prolly made this dessert like 47 times (not exaggerating) and each time I learn something new. Some batches were perfection, others were basically sweet scrambled eggs (blegh). But that’s exactly why I’m sharing everything I’ve learned about mastering this fancy-pants dessert today!!
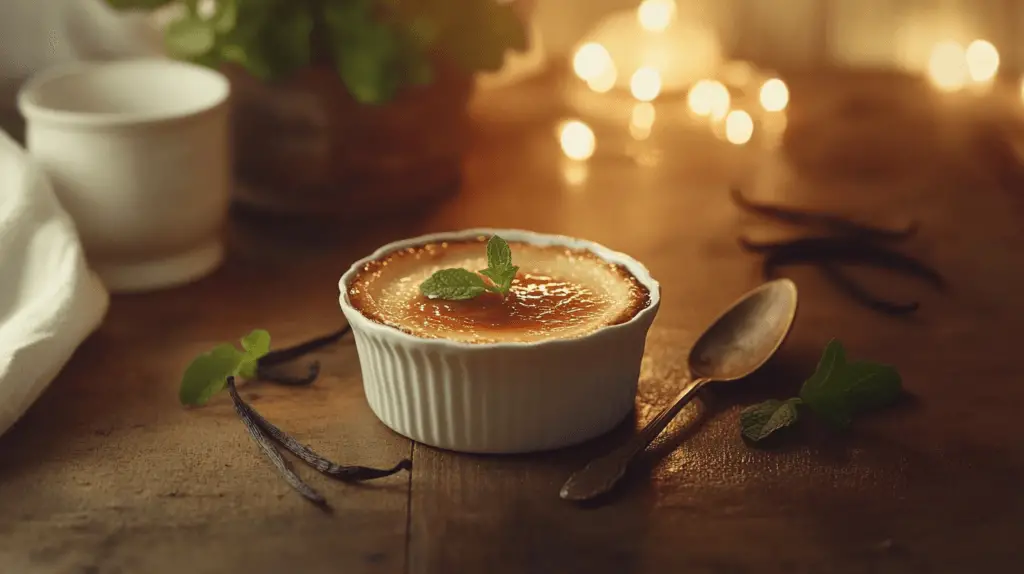
So here’s the deal. Crème brûlée isn’t just a dessert—it’s this whole EXPERIENCE thing. You know what I’m talking about… that satisfying CRACK when you tap your spoon through the caramelized sugar top, then the smooth, cool custard underneath. It’s like a texture party in your mouth!!! And I’m your invitation. Wait, that sounded weird. Moving on…
What Even IS Crème Brûlée Anyway???
K so the thing about crème brûlée is that it sounds super intimidating cuz it’s all French and fancy. But guess what? It’s basically just custard with a hard sugar top! That’s it!
The name literally means “burnt cream” which sounds gross but is actually amazeballs. The secret of crème brûlée is in that contrast between textures—hard sugar shell + silky custard = HEAVEN.
I remember the first time I had real crème brûlée at this restaurant in downtown Portland (not telling which one cuz they closed and I’m still not over it). I actually gasped. OUT LOUD. The server laughed at me but whatever, it was worth the embarrassment.
The Secret Ingredients You Need (Nothing Fancy, Promise!)
Here’s the craziest part about crème brûlée… you only need a few basic ingredients! Like, stuff you prolly already have. Except maybe vanilla beans, which cost a fortune these days but are totally worth it if you’re feeling fancy.
Here’s what you’ll need:
Heavy cream – 2 cups (don’t even THINK about using half and half, I’ve tried it and… just no) Vanilla bean/paste – 1 pod OR 1 tsp Egg yolks – 5 large ones (save the whites for something else, I dunno, meringue or whatever) Granulated sugar – 1/3 cup Brown sugar – for the top part
I’m telling you right now—the better quality ingredients you use, the better it’s gonna taste. Like, splurge on the good vanilla. Use farm-fresh eggs if you can get em. You’ll taste the difference I SWEAR.
What Each Ingredient Actually DOES (Food Science, Y’all!)
Soooo… I’m kinda obsessed with knowing WHY things work in recipes. Drives my husband nuts when I go all food-nerdy. But seriously, understanding what each ingredient does helps sooo much when troubleshooting!
Heavy Cream
This is basically the backbone of your whole operation. It needs to be HEAVY cream, not just regular milk or even half-and-half. The fat content is super important for that rich, velvety texture we’re after. I once tried making it with milk and… let’s just say my garbage disposal ate well that day.
Vanilla Bean
OMG vanilla beans are like culinary gold these days, right?? But mannn they’re worth it. If you splurge on nothing else, splurge here. That little black pod contains approximately 8 million tiny flavor bombs (I’m exaggerating but you get it). If you’re using extract instead, make sure it’s the real deal, not that fake vanilla-flavored nonsense.
Egg Yolks
These babies are the structural engineers of your dessert. They’re what give the custard that perfect creamy-but-not-too-dense consistency. Too few yolks = runny mess. Too many = weird eggy flan thing. 5 is the magic number I’ve found.
Granulated Sugar
This sweetens the actual custard part. It dissolves super easily which means your custard will have that perfect smooth texture without any grittiness. Don’t substitute other sweeteners here unless you wanna gamble with your dessert’s life.
Brown Sugar Topping
THIS. This is where the magic happens!!! The sugar on top that gets torched into a glassy, amber crust is what makes crème brûlée ACTUAL crème brûlée. Without it, you’ve just got… custard. Boring.
Techniques That Make or Break Your Crème Brûlée (I Learned the Hard Way)
Ok so the secret of crème brûlée isn’t just in the ingredients—it’s ALL about technique. And lemme tell you, I’ve messed up in every possible way so you don’t have to!
1. Infusing the Cream with Vanilla (Patience, Grasshopper)
This is where you heat up the cream with the vanilla to get all that flavor goodness. BUT!!! Do NOT boil it! Just warm it gently, then let it sit for a bit to really get the flavor in there. One time I got distracted by a phone call and my cream boiled over and the smell was… not great. My kitchen smelled like scorched milk for days.
2. Tempering the Eggs (AKA Don’t Make Scrambled Eggs)
This part is CRUCIAAALLLLL. You gotta slowly add the warm cream to the egg yolks while whisking like your life depends on it. If you pour it all in at once or don’t whisk enough… congratulations! You’ve made sweet scrambled eggs. Ask me how I know.
Anyway, the whisking thing combines everything without cooking the eggs. It’s like a careful dance of hot and cold.
3. Using a Water Bath (Trust Me On This)
Ok so putting your little custard cups in a bigger pan with hot water sounds like extra work and dishes. Which it is. BUT!!!! It’s non-negotiable, people! The water bath makes sure everything cooks evenly and gently.
I skipped this step once because I was feeling lazy and my custards came out with the texture of… have you ever seen those stress balls that are like, firm on the outside but weird inside? Yeah. That.
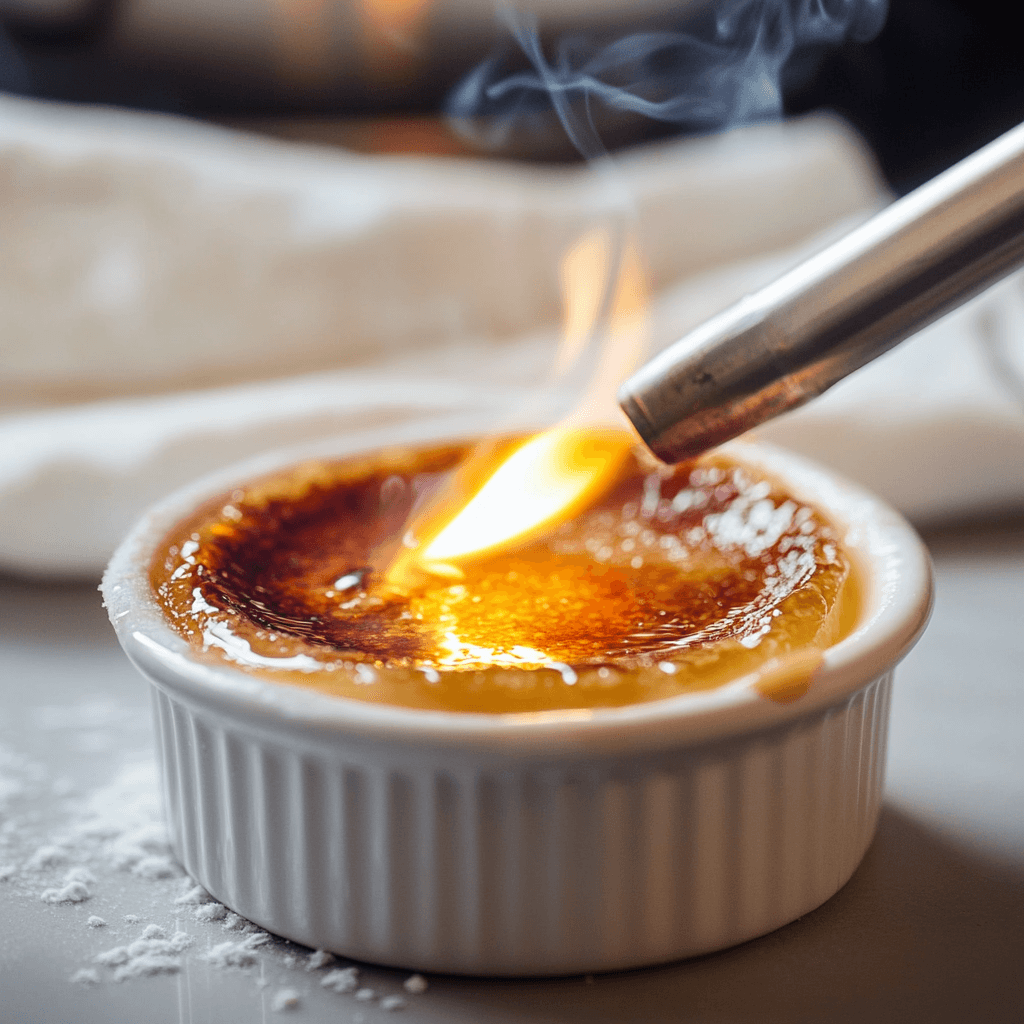
4. Perfecting That Sugar Crust (The Fun Part!!!)
This is honestly the most satisfying part of making crème brûlée. You get to use a KITCHEN TORCH! Like, an actual FIRE TOOL in your KITCHEN! How fun is that??
Sprinkle the sugar evenly (this is important), then torch it until it’s all melty and golden. The secret of crème brûlée truly lies in this step—too little heat and you’ve got a gritty sugar layer, too much and you’ve got carbon. Neither is good.
Don’t have a torch? No worries—your oven’s broiler works too. Just keep a close eye on it because it goes from perfect to burnt in approximately 0.3 seconds.
My Tried-and-True Crème Brûlée Recipe (That Actually Works)
Alright friends, here’s my recipe that I’ve tweaked and perfected over the years. It WORKS. Promise.
Ingredients (Makes 4-6 servings, depending on how greedy you are)
- 2 cups heavy cream (the heaviest you can find!)
- 1 vanilla bean OR 1 tsp vanilla paste (extract works but isn’t as good)
- 5 large egg yolks (room temp is best)
- 1/3 cup granulated sugar
- Brown sugar for topping (or regular sugar works too)
Instructions (Follow These EXACTLY)
- Preheat your oven to 325°F (163°C). I know most recipes say 350°F but trust me on this lower temp.
- Heat the cream and vanilla in a saucepan over medium heat until it’s warm but NOT boiling. Like, if you stick your finger in it should feel hot but not burn you. Not that I’m suggesting you stick your finger in hot cream. But if you did…
- Let the cream mixture sit for a few minutes to really get that vanilla flavor in there. This isn’t optional! The flavor development is key.
- In a bowl, whisk the egg yolks and granulated sugar until they’re pale and smooth. Your arm will probably get tired. Consider it your workout for the day.
- This is the important part: SLOWLY pour the warm cream into the yolk mixture while whisking constantly. Like, have someone else pour while you whisk if possible. Or pour a tiny bit, whisk, pour a tiny bit more, etc.
- Strain the mixture through a fine-mesh sieve to catch any eggy bits or vanilla pod pieces. Don’t skip this! It makes such a difference in the final texture.
- Pour the strained custard into your ramekins. Don’t fill them all the way to the top—leave a little space.
- Place the ramekins in a deep baking dish. Pour hot water into the dish until it comes about halfway up the sides of the ramekins. Be careful not to splash water into your custards!
- Bake for 35-40 minutes. They should be mostly set but still have a slight jiggle in the center. Like, if you gently shake the pan, they should wobble a bit in the middle but not be liquid.
- Let them cool to room temperature, then refrigerate for AT LEAST 4 hours. Overnight is even better. I know it’s hard to wait but I promise it’s worth it.
- Right before serving (and I mean RIGHT before), sprinkle a thin layer of brown sugar on top of each custard. Then torch that sugar until it melts and turns golden. This happens really fast so pay attention!
- Let the caramelized sugar harden for a minute, then serve immediately for maximum contrast between the warm, crisp top and the cold, creamy custard.
Common Mistakes That’ll Ruin Your Crème Brûlée (Been There, Done That)
The secret of crème brûlée isn’t just about doing things right—it’s about NOT doing things wrong! Here are the mistakes I’ve made so you don’t have to:
Overheating the Cream
If your cream boils, it gets this weird skin on top and can scorch on the bottom. Keep it on medium-low heat and watch it like a hawk!
Skipping the Water Bath
I mentioned this already but it bears repeating: THE WATER BATH IS NON-NEGOTIABLE. Without it, your custards will cook unevenly and might curdle.
Overbaking
If you bake until the custards are completely set, they’re already overcooked. They should have that slight jiggle in the center when you take them out.
Not Straining the Mixture
This seems like a fussy extra step but it’s so important for getting that silky-smooth texture. Otherwise you might get little cooked egg bits in your custard and nobody wants that.
Using Cold Eggs
I didn’t mention this before but room temperature eggs blend so much better than cold ones. Take your eggs out of the fridge about 30 minutes before you start.
Get Creative! Crème Brûlée Variations That’ll Blow Your Mind
Once you’ve mastered the classic version, you can start playing around with flavors! Here are some of my faves:
Chocolate Crème Brûlée
Replace 1/3 cup of the cream with melted dark chocolate. OMG so decadent! It’s like chocolate pudding had a glow-up.
Citrus Crème Brûlée
Add the zest of an orange or lemon to the cream while heating it. Just make sure you strain it out before baking! This version is so refreshing and cuts through the richness.
Would you like to save this?
Coffee Crème Brûlée
Add 1-2 teaspoons of instant espresso powder to the cream. Perfect for after dinner when you want dessert but also need to stay awake for whatever reason.
Matcha Crème Brûlée
Mix 1 teaspoon of matcha powder into the egg yolk mixture. It turns this gorgeous green color and has this earthy flavor that’s soooo good with the sweet custard.
I once tried making a lavender version that was… interesting. My husband said it tasted like fancy soap. Maybe don’t try that one.
Pro Tips That’ll Make Your Crème Brûlée Next-Level Amazing
Here are some extra little tips I’ve picked up along the way:
Chill The Custard Overnight
Seriously, the flavor gets SO much better if you let it sit in the fridge overnight. Something about the vanilla and cream getting friendly with each other or whatever.
Use Shallow Ramekins If You Can
The wider and shallower your dishes, the more surface area you get for that caramelized sugar topping. And let’s be honest, that’s the best part!
Get Creative With Flavor Infusions
Try steeping different things in your cream—cinnamon sticks, cardamom pods, even tea bags! Just make sure you strain them out before mixing with the eggs.
Perfect Your Sugar Layer
Use the finest sugar you can find for the topping. It melts more evenly and gives you that perfect glass-like crack. If you’re using regular granulated sugar, you can pulse it in a food processor to make it finer.
I’ve found that a mix of white and brown sugar on top gives the BEST flavor. Like 2 parts white to 1 part brown. Try it!
How to Serve Your Masterpiece (And What Goes With It)
Crème brûlée is pretty perfect on its own, but here are some serving suggestions:
A few fresh berries on the side adds a nice pop of color and cuts through the richness.
A tiny shortbread cookie for dipping is chef’s kiss.
If you’re feeling extra fancy, a small glass of dessert wine like Sauternes pairs amazingly well.
My personal favorite way to serve it? By itself, eaten standing up at the kitchen counter after the kids go to bed. Just being real here.
The Origin Story (Because Food Has History!)
Did you know there’s actually a big debate about where crème brûlée came from? The French claim it (obviously, it’s got a French name), but the Spanish have a similar dessert called crema catalana, and the English have something called “burnt cream” that dates back centuries.
I personally think they all independently discovered that sugar + fire + custard = deliciousness. Some culinary discoveries are just universal!
The first official recipe showed up in a French cookbook from 1691, which is pretty cool to think about. People have been torching sugar for over 300 years!
FAQ: All Your Burning Crème Brûlée Questions Answered!
Can I Make Crème Brûlée Without a Torch?
Yes! Your oven’s broiler works too. Put the ramekins on the top rack, as close to the broiler as possible, and keep a VERY close eye on them. They’ll caramelize in about 1-2 minutes.
How Long Can I Store Crème Brûlée?
The custards will keep in the fridge for up to 3 days, BUT don’t add the sugar topping until right before serving. Otherwise it gets soggy and sad.
Why Is My Crème Brûlée Runny?
Probably underbaked. The custard should be mostly set when you take it out of the oven, with just a slight jiggle in the center. If it’s already runny when it comes out, it won’t set up in the fridge.
What’s the Best Way to Get an Even Sugar Crust?
Sprinkle the sugar evenly, then gently tilt and tap the ramekin to distribute it. When torching, move in small circles from the outside in for even caramelization.
Can I Make Crème Brûlée Ahead of Time?
Absolutely! The custard part can be made up to 3 days ahead. Just keep them covered in the fridge and add the sugar topping right before serving.
What If I Don’t Have Ramekins?
Any shallow, oven-safe dish will work! I’ve even used coffee mugs in a pinch. Just make sure they can handle the heat of the oven AND the torch.
Does the Water for the Water Bath Need to Be Boiling?
Hot tap water works fine! No need to boil it first. Just make sure it’s hot enough to create steam in the oven.
For even more amazing tips on perfecting your crème brûlée technique, check out this awesome guide that helped me solve some of my early crème brûlée disasters!
More Recipes You’ll Love
If you enjoyed this crème brûlée recipe, here are some other treats from my blog that you might want to try:
Strawberry Cheesecake Bars Recipe – These are like summer in dessert form! Perfect for when you want something creamy but a little lighter than crème brûlée.
Mini Cinnamon Roll Cheesecakes – Another individual dessert that’s sure to impress your guests (or just yourself, no judgment).
Baklava Origin Lebanese The True Story – If you’re into desserts with interesting cultural backgrounds, this post about baklava is fascinating!
Dessert Bars Recipes – For when you want something sweet but don’t have time for individual ramekins.
Final Thoughts On The Secret of Crème Brûlée
So there you have it, friends—all my hard-earned crème brûlée wisdom in one ridiculously long post! The secret of crème brûlée really comes down to patience, attention to detail, and not being afraid of a little kitchen torch action.
Is it a bit fussy? Yeah. Takes some practice? Definitely. But is it worth it? ABSOLUTELY. There’s something so satisfying about cracking through that perfectly caramelized sugar top to get to the silky custard underneath. It’s like a little moment of luxury you can create in your own kitchen.
Plus, it’s guaranteed to impress anyone you serve it to. They don’t need to know how simple the ingredients actually are!
Let me know in the comments if you try this recipe or if you have any questions! I read every comment and try to respond to as many as I can between chasing my kids and trying not to burn things in the kitchen.
Happy torching, friends!!!