Sooooo I’m sitting here on my back porch trying to type this while Charlie (our golden retriever who STILL doesn’t understand personal space at 6 years old) is literally breathing on my keyboard. The check engine light in my Honda that’s been flashing since Christmas finally got fixed yesterday—only took me 4 months to get around to it! Anyway, I’ve been meaning to share this Chicken Milanese recipe that I’ve messed up approximately 17 times before getting it right.
You ever have one of those dishes that you KNOW should be simple but somehow you keep screwing it up? That was me and Chicken Milanese for about 2 years. James kept asking for it because we had this amazing version at that Italian place on 23rd that closed (RIP Nonna’s, I miss your tiramisu soooo much), and I kept making these sad, soggy chicken cutlets that were… edible? But definitely not what we remembered.
The Chicken Milanese Journey of Disasters
Let me tell you about attempt #12, which was prolly the worst. Emma was home from college (she’s in her environmental science program and keeps telling me my cleaning products are killing the planet) and I was trying to impress her with my “evolved cooking skills” since she left. Spoiler alert: MASSIVE FAILURE.
I bought all the fancy ingredients, had my station all set up, and then got distracted by a call from my sister about mom’s birthday present and completely forgeddabout the oil heating up. Smoke EVERYWHERE. The smoke detector wouldn’t stop, Charlie was barking, and James walks in from work to complete chaos. We ended up ordering pizza and I didn’t try again for 3 months.
But guess what??? I have FINALLY mastered it! After watching approximately 42 YouTube videos, calling my friend Stephanie (who’s not even Italian but somehow makes perfect Italian food?), and lots of trial and error, I can now make chicken milanese that’s actually crunchy and golden and delish-ifying.
So lemme share my hard-earned wisdom so you don’t have to suffer like I did.
What Even IS Chicken Milanese Anyway?
Before we dive into my tips, let’s talk about what this dish actually is, cause maybe some of you are like “what is she even talking about?”
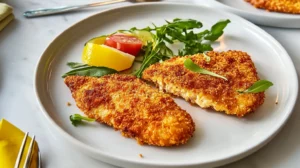
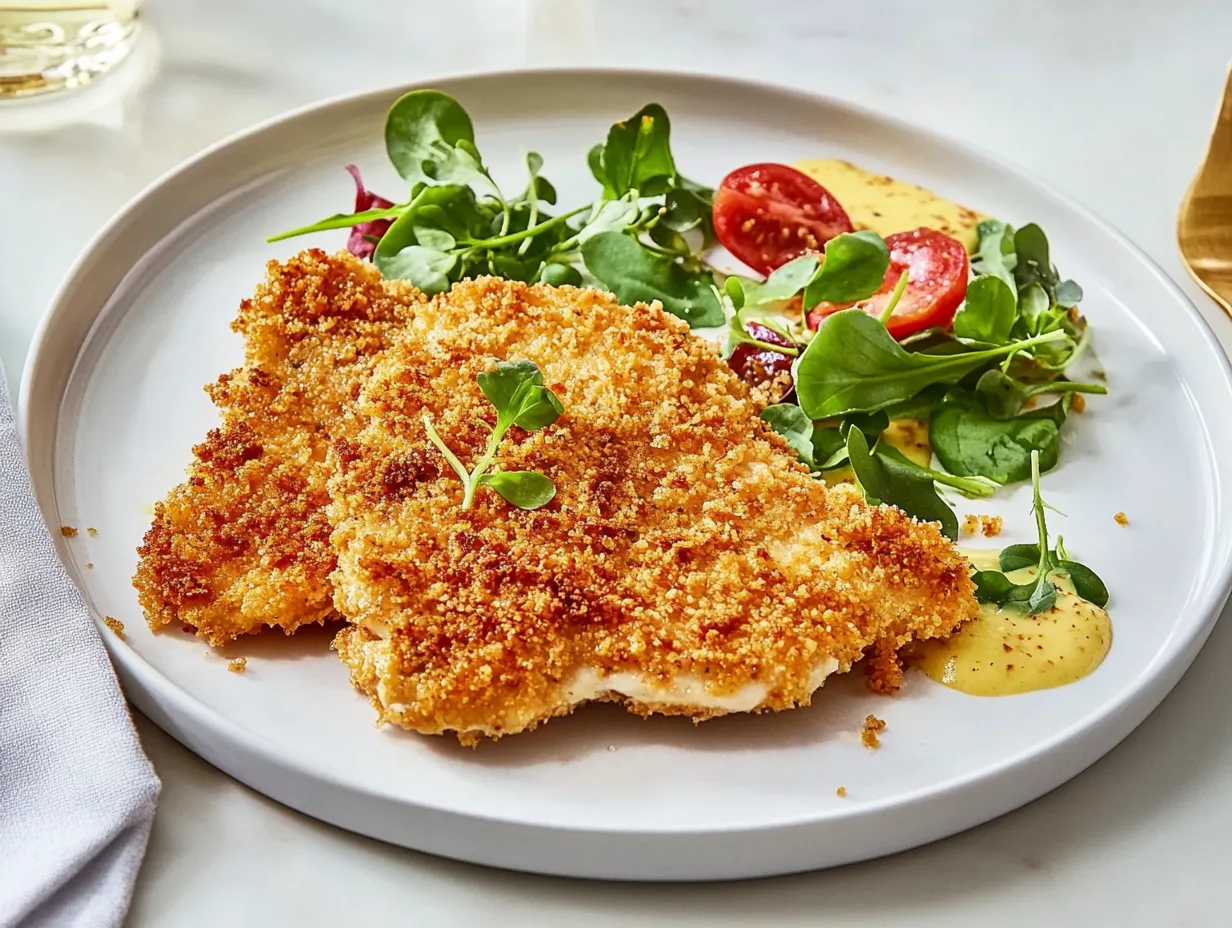
Chicken Milanese is basically a thin chicken cutlet that’s breaded and fried until crispy. It’s an Italian dish (from Milan, duh) that’s simple but sooooo good when done right. It’s like chicken parm’s less complicated cousin who didn’t go to grad school but still turned out successful.
1. Choose the Right Chicken (And Beat It Up)
First things first—you need boneless, skinless chicken breasts. I’ve tried using thighs once when I was desperate and had forgotten to defrost the right thing (classic me) and it was… weird? Not bad weird but not right either.
SO what you’re gonna do:
Put your chicken between two pieces of plastic wrap (I’ve used a ziplock bag cut open in desperate times) and pound the heck out of it with… well, I use a wine bottle because after 6 years I STILL can’t find my meat mallet after we moved. WHERE DID IT GO??? It’s like it entered another dimension along with all my missing left socks.
You want it about 1/4 inch thick. If you pound it too thin it kinda disintegrates which I learned the hard way during attempt #8 when I was taking out some aggression after Ryan called to say he was changing his major AGAIN. (That’s 4 times now if anyone’s counting. Love that kid but seriously?!!?)
Oh and trim off the fat bits! Nobody wants to bite into that chewy nonsense.
2. The Breading Process (That I Always Messed Up Until Now)
K so the breading process is where I used to go terribly wrong. There’s an actual ORDER to it, who knew?!
Here’s what you ACTUALLY need to do:
- First, coat the chicken in flour. Just regular all-purpose flour, nothing fancy.
- THEN dip it in beaten eggs. (Once I tried to skip the eggs to “save calories” and the breading just fell off immediately. Learn from my mistakes ppl!)
- FINALLY coat it in breadcrumbs—panko is best for extra crunch but regular works too
I watched this Italian grandmother on YouTube who kept saying “DRY WET DRY” over and over and that finally made it stick in my brain. Unlike attempt #4 where the breading didn’t stick to anything except my kitchen counters.
3. Season Every Single Layer Because Otherwise It’s Boring
Here’s where I think I’ve actually improved on some of the traditional recipes. You gotta season EVERY LAYER not just the chicken!
I add salt, pepper, and garlic powder to the flour.
For the egg wash, I whisk in a little dijon mustard and some grated parm (the good stuff, not the green can that Ryan still puts on everything).
In the breadcrumbs I mix in dried oregano, some parsley, and a touch of paprika.
This makes such a difference you guys! The first time I did this James was like “what did you do differently?” which is HUGE coming from the man who once didn’t notice I’d dyed my hair 3 shades darker.
4. Let That Coating Set (Patience Is Not My Virtue)
Ok so apparently you’re supposed to let the breaded chicken REST before frying?? This was news to me after like 15 failed attempts.
You need to let it sit for like 10-15 minutes minimum. This helps everything stick together so your carefully applied breading doesn’t immediately abandon ship as soon as it hits the oil (like attempt #6 through #11).
I usually stick them in the fridge on a wire rack (learned that from attempt #14 when I used a plate and the bottom got all soggy).
This is when I usually pour myself a glass of wine and check Instagram, which sometimes turns into 30 minutes of scrolling through vacation photos of people I haven’t seen since high school, so my chicken gets EXTRA resting time haha!
5. Oil and Temperature Matter A LOT (Science Is Hard)
OK, this part is actually important and I messed it up a lot. You need the right oil at the right temperature.
I use vegetable oil because I always have it, but canola works too. I tried olive oil once and set off the smoke alarm AGAIN because apparently it has a lower “smoke point” which I didn’t know was even a thing until I was frantically googling “WHY IS MY KITCHEN FULL OF SMOKE AGAIN” at 6:37pm with hungry people staring at me.
The oil needs to be at 350-375°F which I now check with a thermometer because I’m a responsible adult (most days). I got it for Christmas from Emma who was clearly tired of getting texts like “is oil supposed to be smoking like this???”
If the oil is too cold, your chicken gets all greasy and sad. If it’s too hot, the outside burns while the inside stays raw which was the special surprise of attempt #9.
6. Don’t Crowd the Pan (Give Your Chicken Some Personal Space)
This was another big revelation! You can’t just throw all the pieces in at once! Who knew?
Apparently when you add cold food to hot oil, it drops the temperature. So if you add too many pieces at once, the temperature drops too much and instead of frying, your chicken is just kinda… swimming? In warm oil?? Which equals soggy breading.
I literally only cook 1-2 pieces at a time now, depending on the size of my pan. Yes it takes longer but I’m already committed at this point so whatever.
This is usually when I pour glass of wine #2 and James wanders in to ask “is it done yet?” approximately 5 times.
7. Let It Drain (But Not on Paper Towels – Mind. Blown.)
After you’ve fried your chicken to golden perfection (2-3 minutes per side, but honestly I just go by color), you need to drain it properly.
DO NOT put it on paper towels like I did for attempts #1 through #16!!! The bottom gets all soggy and ruins all your hard work!
Would you like to save this?
Instead, put it on a wire rack over a baking sheet. This lets air circulate all around and keeps it crispy on all sides.
This was literally the final piece of the puzzle that made attempt #17 the successful one that had James saying “this is better than the restaurant version” which might be the nicest thing he’s said about my cooking since that time I made lasagna in 2021.
What To Serve With Your Perfect Chicken Milanese
Now that you’ve spent approximately 84 years perfecting this dish (or at least that’s how it felt to me), what do you serve with it?
I like to do the classic Italian thing with arugula and cherry tomatoes with a squeeze of lemon on top. The peppery arugula and acidic lemon cut through the richness of the fried chicken in a way that makes you feel slightly less guilty about eating fried food.
Sometimes I serve it with pasta, but James is doing that low-carb thing again (for the 3rd time this year and it’s only April…) so we’ve been doing roasted veggies instead.
OR make it into a sandwich on ciabatta with some fresh mozz and basil! This is Ryan’s favorite when he’s home, which reminds me I need to check if he’s coming home this weekend or if he’s “too busy” (aka hanging out with that new girlfriend he thinks I don’t know about yet).
FAQ: The Questions Y’all Keep Asking Me
Can I make Chicken Milanese ahead of time?
You CAN but it’s never as good as fresh. If you must, reheat it in the oven at 375°F for like 10 mins instead of the microwave which makes it all sad and soggy. Ask me how I know…
Can I use chicken thighs instead of breasts?
Technically yes, but they don’t pound out as nicely and the texture is different. But if you’re a dark meat person (like James, who complains about “dry chicken” even when it’s NOT), go for it.
How do I know when the oil is hot enough without a thermometer?
Drop a breadcrumb in—if it sizzles immediately and floats, you’re good to go. If it sinks sadly to the bottom, keep waiting. If it burns instantly, your oil is too hot and you should prolly turn down the heat before you’re explaining to your homeowner’s insurance why there’s smoke damage in your kitchen (again).
Can I bake this instead of frying for a healthier version?
You CAN, and I’ve tried it during that phase in January when I was trying to be “healthy new year new me” blah blah… but honestly? It’s just not the same. You can spray it with cooking spray and bake at 425°F for about 20 mins, flipping halfway. It’s… fine. But not the crispy dream we’re going for. Sometimes you just gotta embrace the fried goodness, ya know?
Will this work with gluten-free flour and breadcrumbs?
Yes! My friend Melissa (who has celiac) came over and we made it with gluten-free stuff and it worked great. The texture was slightly different but still crispy. You might need to adjust the frying time slightly—ours cooked a bit faster.
The Bottom Line on Chicken Milanese
I may have taken the scenic route to getting this dish right (with many smoky detours), but now that I’ve figured it out, it’s actually one of my go-to dinner party dishes. It looks fancy but isn’t actually that hard once you know all these little tricks.
If I—the woman who once set spaghetti on fire (don’t ask)—can master this, you definitely can too.
Oh! And before I forget (again), here’s that link to the Chicken Milanese recipe that I used as my starting point before all my modifications.
Let me know if you try it and how it turns out! I’m reallyyy hoping your journey is less chaotic than mine was.
More Recipes You Might Like If You Enjoyed This One
If you liked this recipe, you might also enjoy some of these other recipes from my site:
- Sweet Hawaiian Crockpot Chicken – for when you want something totally different but equally delicious
- Garlic Butter Steak Bites – another quick dinner that seems fancy but is actually super easy
- Crockpot Chicken Spaghetti – for those days when you can’t be bothered to stand over the stove
- Garlic Butter Chicken Bites with Parmesan Pasta – another family favorite that’s ready in under 30 minutes
OK I’m off to walk Charlie who has been giving me the sad eyes for the past hour. Then I need to call my mom about that birthday thing, and figure out why my bathroom sink is making that weird gurgling noise again. #neverending
Till next time!
—Lisa